***This article is about a Beta version only available to some customers. If you are not a Beta user, please see this article instead.***
The creation of groups allows you to group contacts according to specific criteria. These groups can then be used to send targeted messages or to create statistics. A criterion includes variables, which, when met, automatically include the corresponding contact in the group, or, in the opposite case, exclude the contact. In this article, you will learn how to create a group and then add conditions to this group.
Access path: Audience → Targeting → Groups |
Step 1: Convert a Group or Create a New One
Option 1: Convert a group to the new editor
If you have groups that have been created with the old editor, you can convert them by going in the group you want to convert. You will then see this message in the upper part of the editor: After converting a group, you can still toggle to the old interface as long as you don't make any changes to the group in the new interface.
A minority of groups are not compatible with the new interface and cannot be converted. If it's your case, please contact your CSM to get assistance.
Option 2: Create a new group
Follow the access path and, in the upper right of the groups list, click Create a group.
| If you have a CDP structure, make sure to create the group in the project that is used to create and send communications. Even if you create the group in the unified project, you have access to the fields from the source projects for the conditions. |
In the upper right, click Edit to modify the group information:
Then, fill-in the information about the group:
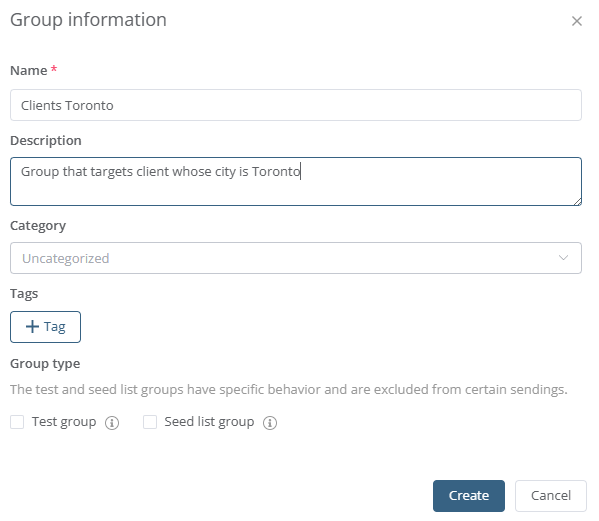
- Define the Name of the group for every language of the project.
- Select a Category if needed.
- Add a Tag if needed.
- Check Test group or Seed list group if it applies to your group (learn more by reading this article).
Step 2: Add Conditions
First, indicate how to execute the conditions you will add:
All: A contact must meet all the conditions to be included in the group.
At least one: A contact must meet at least one of the conditions to be included in the group.
None: To create an exclusion group. A contact that meets none of the conditions of this group will be included in this exclusion group.
Then, add the required conditions for your group.
Example 1: Group that targets contacts whose city is Toronto
This first example is simple. We use a Profile type condition (in the Contact data section). We use the City field for targeting. The City field value must be filled in the profile of a contact for that contact to be included in the group. |

Example 2: Group that targets contacts whose City is either Toronto OR Calgary OR Vancouver
We take Example 1 and add choices for the City value. |

Example 3: Group that targets contacts whose city is Toronto AND who clicked a link in a message
|
 We take Example 1 and add an Email type condition (in the Communication channels section). This group will target contacts who clicked any link in any message sent with your project. You can use the Refine button to select a specific message/link or to specify a period.
Condition List
Profile: To include contacts according to the values of the fields in their profile. You must choose a field from the project as a filter. Then, use an operator to compare the field to the wanted value.
Persona: To include contacts that correspond to personas created in your project. The updates of personas are done depending on the configured frequency or on demand. You can choose to include a contact that corresponds to one or several personas.
A/B Split: To create a group from segments and create A|B Split campaigns targeting groups containing between 2 and 10 segments. The benefit of this type of group is to make sure a contact will be part of only one segment.
If you choose to divide the contact list into segments, the contacts will be distributed alternately in each segment, according to the contact's ID. In the following example, we have a project with 7 contacts. The distribution would be this way:
| Contact Id 001 | Segment 1 |
| Contact Id 002 | Segment 2 |
| Contact Id 003 | Segment 3 |
| Contact Id 004 | Segment 1 |
| Contact Id 005 | Segment 2 |
| Contact Id 006 | Segment 3 |
| Contact Id 007 | Segment 1 |
You must precise which of the 3 segments is targeted by the group you are creating. If you add new contacts afterwards, they will be associated with one of the segments, without modifying the contacts already in the segments. When you delete a contact, the position that was assigned to this contact remains and is not assigned to another contact. This contact is deleted from the campaign.
Device: To include contacts who opened a message with a specific device type (tablet or mobile) or platform (Apple, Android, Windows, Blackberry). This type is generally used for statistical purposes.
The system automatically compiles data about the last device or platform a contact used to access a message, and the date of the last access as well. The device used is displayed in the message results. It is important to know that only the last access is taken into account.
Customer Lifecycle: To target contacts according to a phase of their lifecycle.
Administrative: To create a group with administrative information as filters, such as the contact's source (import, form, etc.) or the date of an event involving this contact, like modifying or deactivating. For example, you could create a group with contacts whose profiles have been modified or in the last year.
Geolocation: To target contacts according to their geographic location with a postal code or with a pinpoint on the map (if the IP address or geographical coordinates features are enabled). The options displayed differ depending on the activated features in your project.
Implicit consent: To target contacts who have implicit consent.
Opt-in: To include contacts with an opt-in for a specific communication type or the opposite. For example, you could use this filter to send different content to your subscribers than to your leads.
Score: To include contacts depending on their scoring . The calculation and presentation of the scoring depend on the way it was configured in the project.
Key indicators: To target contacts according to indicators, such as the Customer LifeTime Value.
State: To include contacts depending on their admissibility to your subscriptions (opt-ins). You can use conditions such as sending status (active/inactive) or the email validity, and specify if the contact is part of the kill file or is in quarantine.
Email: To target contacts according to criteria related to an email. You can use filters like the views and clicks. You can refine using a communication type, the number of sendings a time period.
SMS: To target contacts according to criteria related to an SMS. You can use filters like the views and clicks. You can refine using a communication type, the number of sendings a time period.
Mobile Push: To target contacts who received or opened a Mobile Push notification.
Web Push: To target contacts who received or opened a Web Push notification.
Landing page: To include contacts who visited one of your landing pages or who have met the goal of the page.
Event: To include the contacts who took an action regarding an event (registered, participated (were present), cancelled or have not confirmed). This criterion could be used to send a registration confirmation, a reminder or an evaluation of the event.
Contest: To include the contacts who participated in a contest or who won a contest. You must have created a contest to see it in the list of choices. You can select more than one contest.
Survey: To include contacts who started answering a survey or completed it.
Site tracking visit: To target contacts who visited one or all your websites that are configured with Journey.
Viewed products: To target contacts who viewed a product or a product category on one of your websites configured with Journey.
Abandoned cart: To target contacts who have an abandoned cart in one of your websites configured with Journey.
Pages views in Journey: To target contacts according to a visited page for one of your websites configured with Journey.
Import: To target contacts who are included in a recent import (in the last 15 days only). You must choose a specific import and specify if you want to include all imported contacts or only those added or modified by this import.
Relational tables: To include contacts using the value of a field from a relational table in your project. For example, you could use a relational table containing transactions of your customers and target those who purchased a specific item.
Queries: This type uses queries related to actions of a contact. If you have queries in your project, they will be displayed in the list. The queries can be from your relational tables, e-commerce or sendings.
Step 3: Select the Group When Sending a Message
When your Groups are ready to be used, you can choose them as recipients to target contacts included in these Groups when sending an email or SMS. You can select one or several if you want to refine the targeting.
Go to the sending interface for email or SMS, then in the Recipients section, check the Group(s) you want to use and click the right arrow to move them to the right side: 
Your recipient will already be updated when you send the message, as long as the contacts' data is updated. This way, you won't have to manage a recipient list manually.