At the heart of your project, there is a contact database. To compile additional information outside of that contact list, you could use a custom table. The objective is to separate data from the main database, thus reducing overloading. Custom tables are aimed at stocking data from imports. This approach improves the clarity and organisation of your project. You can thus create a custom table linked to your contact database (profiling table) or not linked (lookup table).
For example, you could use a custom table to keep track of your contacts' consuming history or activities. Some modules automatically generate custom tables, like the E-Commerce module.
Before Starting
Reflect on your import needs to determine the structure of your custom table: What type of data do you want to import? Which of your activities generate valueable data? When you will create your custom table, you will create fields that will be used to host the import data.
| If you have a CDP structure, make sure to create your relational tables in the project (the unified project or a source project) where the data will actually be used (e.g., for targeting, personalization, or analysis). |
How To
Start by going in Project → Data Management → Relational Data and click Create a custom table: If you do not see the button Create a custom table, you may have to activate the module first or make a request to activate it. If you do not see the button Create a custom table, you may have to activate the module first or make a request to activate it. |
In the New window, specify the Code, Name and Type (profiling or lookup): |
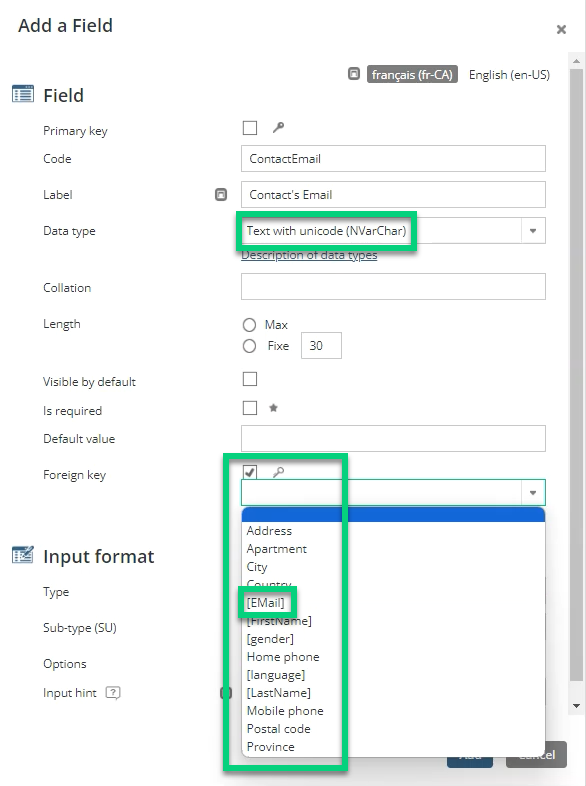
Understanding the difference between profiling and lookup tables Profiling A profiling table is linked to your project's contact database with a foreign key (a foreign key is mandatory with a profiling table). The foreign key is a field in the table, whose value corresponds to a project's field. When you create a foreign key, the options are different depending on the fields created in your project and data type you choose:
Since profiling tables stock additional information on your contacts and links th information to your contact database, it could be used to create segments, target contacts or generate product recommendation. Profiling data improve the knowledge on customers by creating a 360° profile.
Lookup A lookup table is not linked to the project's contacts database. A foreign key is unnecessary (contrary to profiling tables). However, you could use one to link another custom table in your project. Lookup data stock information by linking them to contacts. These data are frequently used to stock representatives or branches, activities organized by your business or products catalogue, etc.
| ||||||||||

Then, add fields that will be used to host data from imports into your custom table: 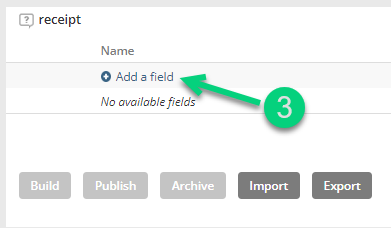 |
For each custom table, you must add a field defined as a primary key: |
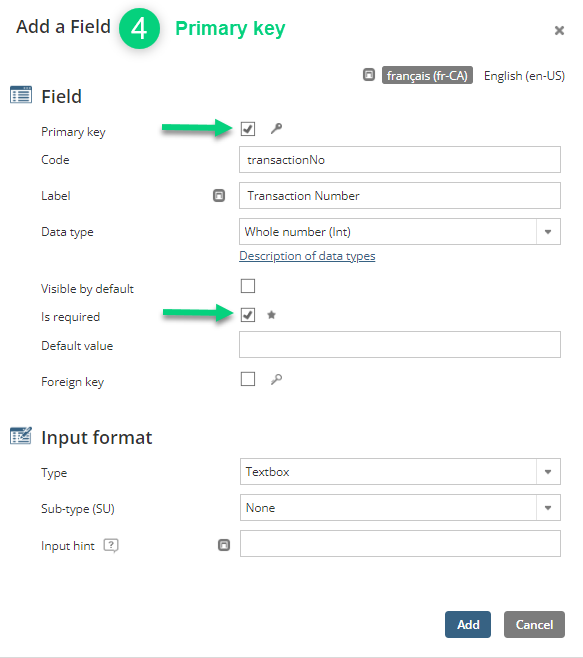
Understanding Data types The data type lets you define the format of valid input in the field. The default data type is Whole Number (Int) since it is the first in the list. Voir la liste
|
If you created a profiling table, you must add a foreign key field:  If you have created a lookup table, you do not need to add a foreign key. However, you could still add one to link this table to another custom table. If you have created a lookup table, you do not need to add a foreign key. However, you could still add one to link this table to another custom table. |
Add other fields you need in your table and, when you are done, click on Build: |
Once it is built, the table is not yet ready to use. To start using the custom table, click on Publish: Once published, the table displays a green checkmark Once published, the table displays a green checkmark . In this state, the table cannot be archived. To archive a table, you must first unpublish it. . In this state, the table cannot be archived. To archive a table, you must first unpublish it. |
Additional configuration settings, all optional, let you specify how data from the tables should be integrated into the application. Once the options are selected, do not forget to click on Save: |
Next Step
You can now import data in your custom table.