Products synchronized from your Shopify account or imported with other methods to your project can be integrated into your promotional emails. You can find the products you imported through the path Libraries → Products. With these products, you can set up recommandations: new or popular products or promotions. To integrate your products, you need to use one of these product blocks:
| Block Type | Benefits | Drawbacks |
 Product Product |
|
|
 Multiple products |
|
|
 Recommended products |
|
|
In this article, you will learn how to use these 3 block types. For more information, read the article on available email blocks.
Prerequisites
☑ The project must contain a Product table
When you create a project with an E-commerce structure, a relational table for your products is generated: 
☑ The Product relational table must contain products
If your table is empty, you can add products by import or manually :
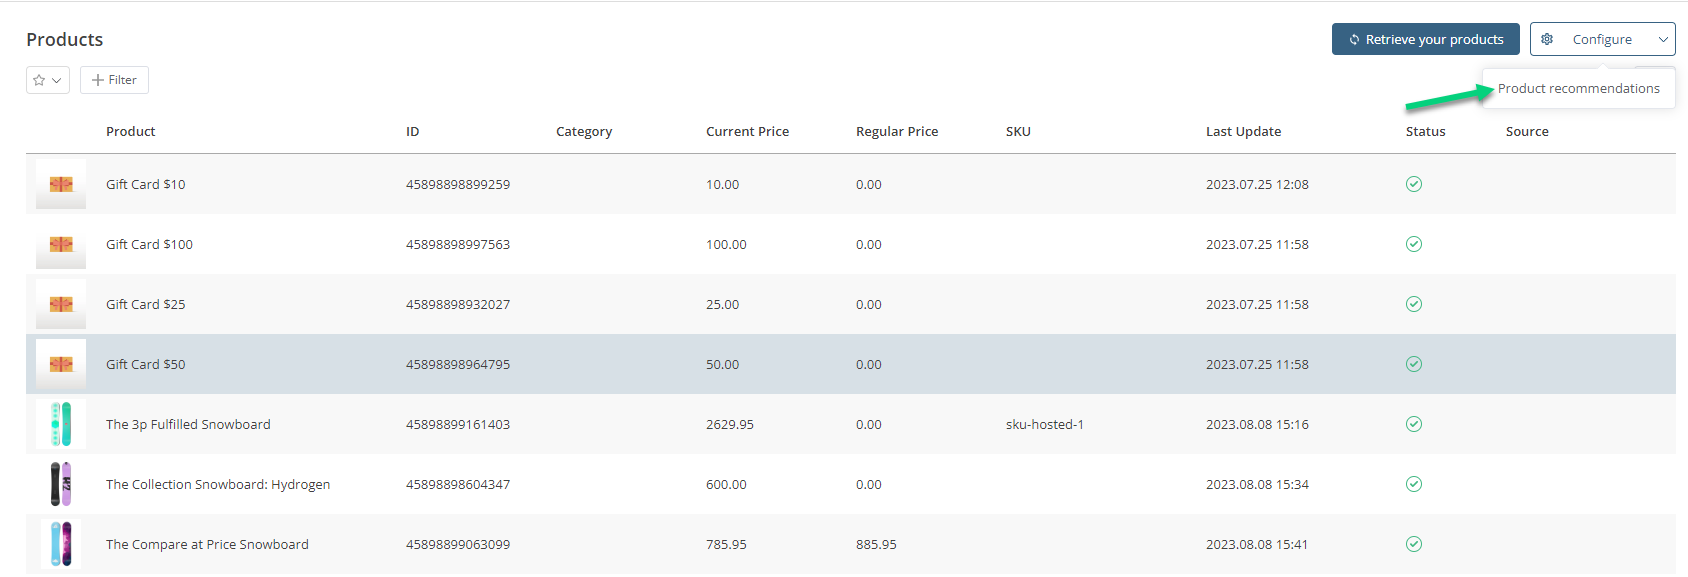
If you use Shopify and the integration is configured, click on Retrieve your products: 
| If you use a CDP structure, make sure to import the products into the project (unified project or source project) that will be used to send messages containing the recommendations. |
Product Block (single)
In the email editor, drag and drop the block into the email:  or you can also drag and drop a product from the list below: or you can also drag and drop a product from the list below: |
Click on the edit icon (pen) in the block: Change the appearance of the block and select the product to display in the email. Change the appearance of the block and select the product to display in the email. |
Multiple Products Block
In the email editor. drag and drop the block into the email: Click on the edit icon (pen) in the block:  Change the appearance of the block and select the product to display in the email. Change the appearance of the block and select the product to display in the email. |
Product Recommendation
Using a Product Recommendation block requires more steps. You must first configure the product recommendation, then integrate the configured recommendation and lastly insert the block into the email.
 Click on Create:
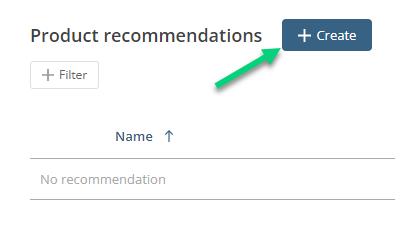
Name your recommendation so it is easier to identify and choose the algorithm that will generate the selection of products to display in your email:

Then, choose the number of products and the targeted period:
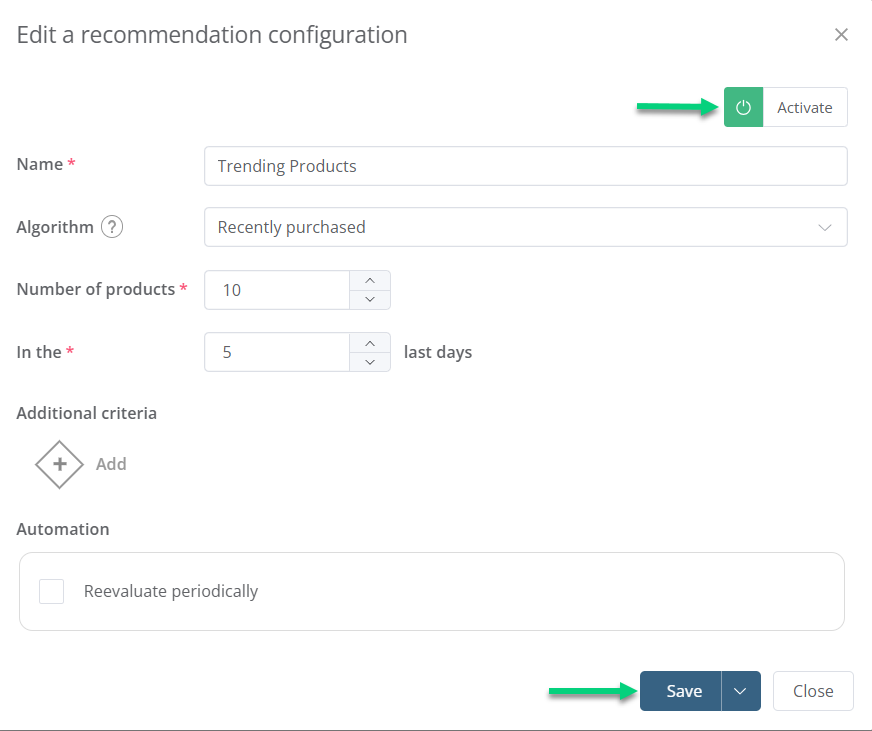 You could add additional criteria (category, price, recency, source). To avoid the need to update the content manually, you can add Automation. When you are done, you must first click on Save and then on Activate (in this order). To see the list of selected products, click on Consult:
Click on Recalculate to update the list:
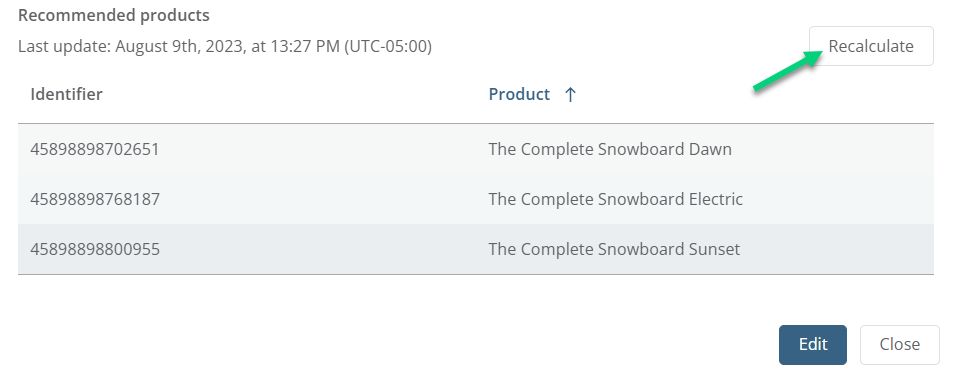 If you have not configured automation at the previous step, you will need to come here and click on Recalculate to update content before sending a new email.
 In the section Connected tools, click on Add:
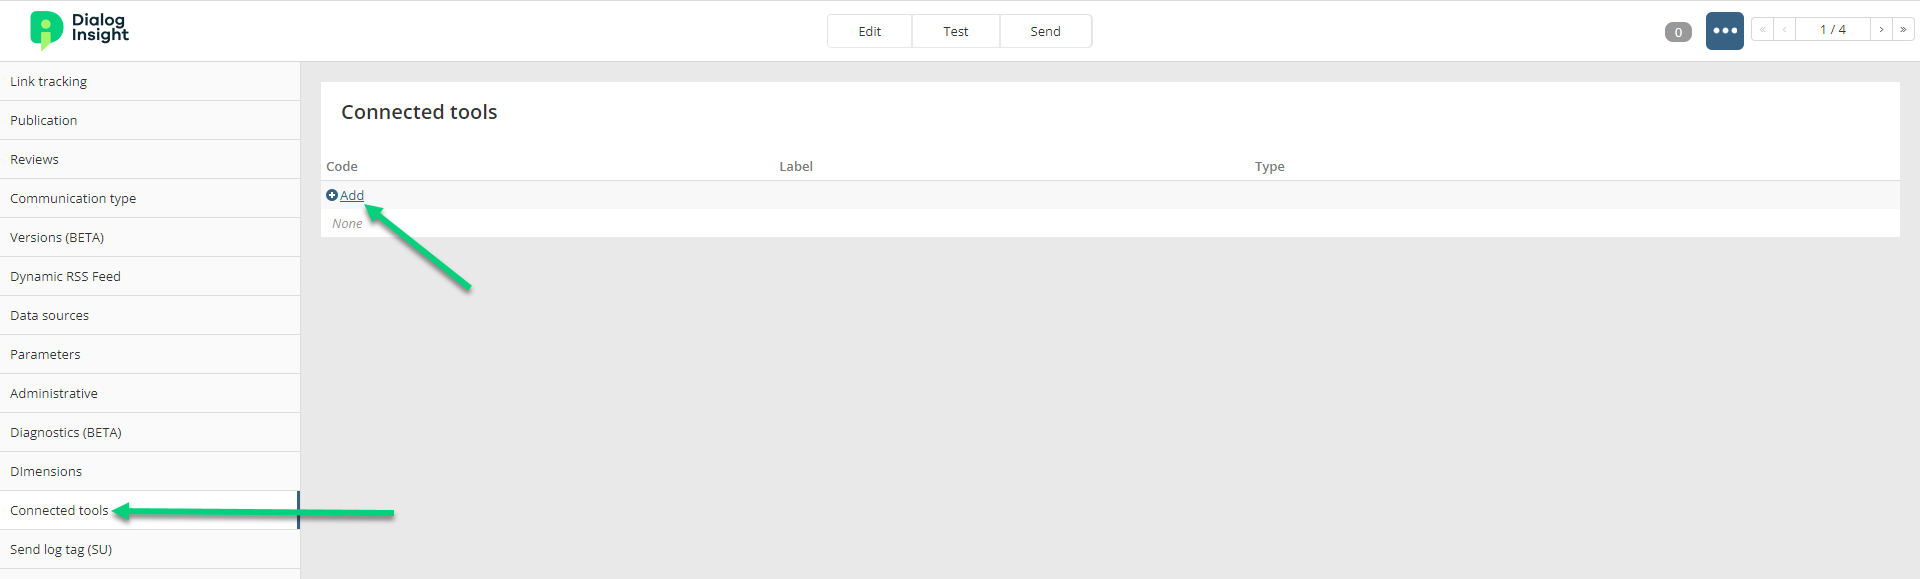
Give a name to the configuration, select the recommendation in the drop-down list and indicate the Minimum number of records*:
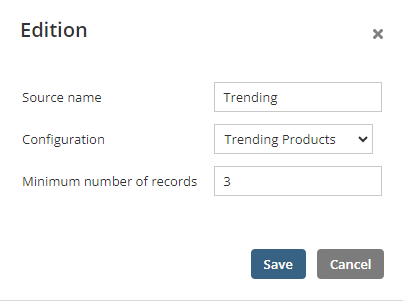 *The Minimum number of records corresponds to the minimum of products that you want to display in this block. This number must not be higher than the number of products calculated in the product recommendation (in the configuration).
 Click on the edit icon (pen) in the block:
 Then, choose the recommendation (configuration you have created in the previous step) and the order of the products. To see the results of the recommendation, click Test.