

To send Web Push notifications from Dialog Insight, you must first configure the website where they will be displayed. This configuration includes adding your website to Dialog Insight, integrating the required scripts into your website, and setting up the permission request that allows visitors to subscribe to notifications. Once the configuration is complete, you can create and send Web Push notifications to your subscribers.
Prerequisites
- Create a Firebase Cloud Messaging authorization
- Involve your IT team
- Have the URL for your website (must be HTTPS)
Step 1: Add the Website
First, go to Communications -> Push Notifications, then click Configurations (in the upper right under the 3 dots):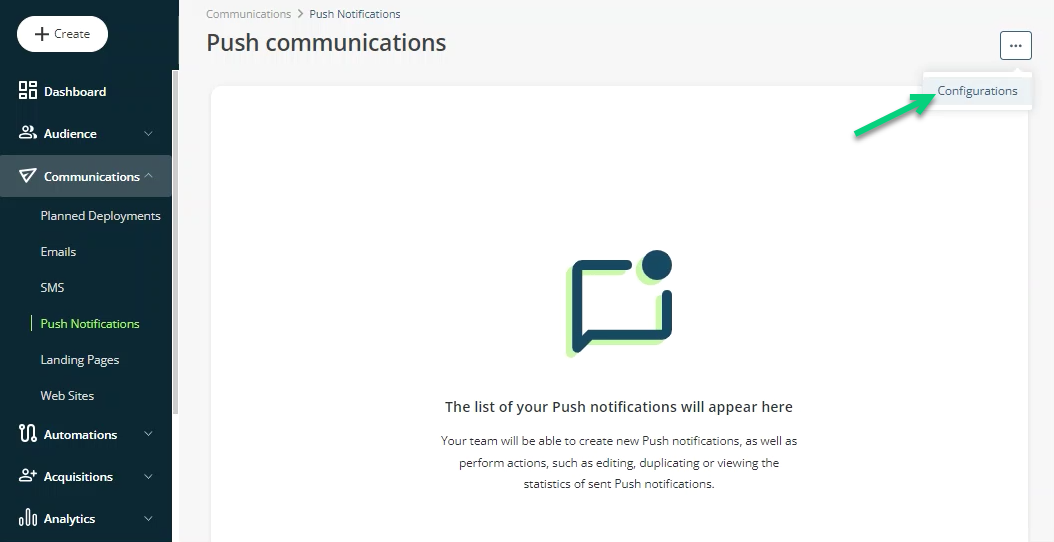
Click Add you website: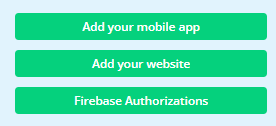
Add the URL of your website and indicate the languages of your website: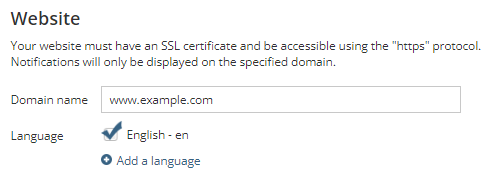 *Don't put the HTTPS at the beginning of the URL.
**It is essential to indicate the languages for which you plan to send notifications so that they will be available when creating notifications.
Step 2: Configure the Web Push Presentation
In the Presentation section, add your brand icon: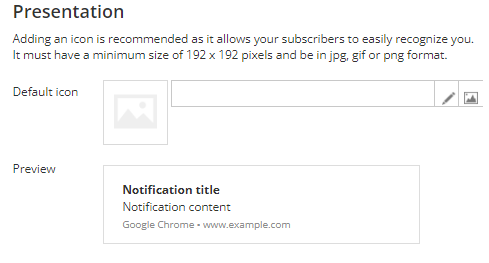
Step 3: Select an FCM Authorization
As mentioned at the beginning of this article, you must create a Firebase Cloud Messaging authorization that acts as a messenger between DI and your website.
Select the authorization, add the JSON from your web app Firebase and indicate the Sender ID: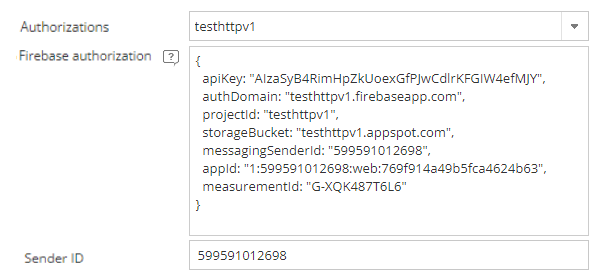
Step 4: Integrate the Web Push on the Website
- In the Code and file section, copy-paste the entire code (script) on ALL the website pages where you want to display Web Push, inside the <head></head> tags, or just before the </body> tag. At the time of the update of this article, the most up-to-date version is 7.4.0.
- Click Download the file and copy-paste this file to the root of your website.
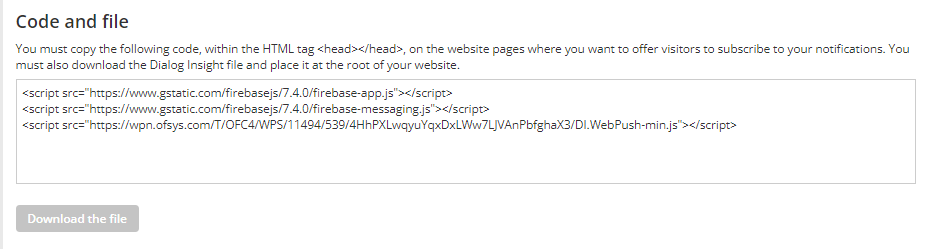
*If your website is on WordPress, install this WordPress plugin to insert the code on your website pages.
You must add a permission request (a popup in the browser asking the website visitor to authorize the website to send notifications.
- Integrate the permission request on your website on a clickable element such as a button, an image, a link, etc.
We recommend that you let the visitor perform the action of requesting instead of displaying the request automatically upon visit. - Add the following function:
DI.WebPush.RequestPermission("language code");The language code must be the 2-character code corresponding to the subscription language.
 //Example after the webpage has been loaded
//This example is not supported by Firefox, you can use one of the two examples below.
<body onload="DI.WebPush.RequestPermission('fr');">

 //Example on a text link
 <a href="#"onclick="DI.WebPush.RequestPermission('en');">
 I wish to receive notifications</a>

 //Example on an image
 <img src="image.jpg" onclick="DI.WebPush.RequestPermission('en');"
 alt="I wish to receive notifications"/>
There are 2 methods to identify subscribers. If you identify subscribers, this will allow you to use data from their contact profile in Dialog Insight to personalize the notifications.
Function that checks if the browser supports web push and if it is supported by Dialog Insight.
if(DI.WebPush.isSupported()){
//This function will return boolean value true if the browser supports them and false if it does not support them.
}
Tip: Display the subscription request on your website only if the browser supports web push.
Function that checks if the visitor has authorized web push in his browser.
if(DI.WebPush.isSubscribed()){
//This function will return boolean value true if the visitor is a subscriber and false if he is not a subscriber.
}
Tip: Do not display the subscription request if the visitor is already a subscriber.
Function that checks if the visitor has blocked web push on the website.
if(DI.WebPush.isBlocked()){
//This function will return boolean value true if the visitor has blocked them and false if he has authorized them.
}
Tip: Do not offer web push if the visitor has blocked them.
Step 5: Test the Permission Request
To ensure Web Push notifications are configured correctly, perform the following tests.
Test with different browsers
Verify that the permission request displays correctly in supported browsers (Chrome, Edge, Firefox, etc.). If the permission request does not appear, the browser may have already saved your choice. Reset the permission for your site before testing again.
Here are some instructions to manage permissions:
- Chrome: Turn notifications on or off
- Firefox: Web Push notifications in Firefox
- Opera: Manage desktop notifications
Test as an anonymous visitor
- Go to your website without identifying yourself.
- Accept the Web Push notifications.
- Verify the number of anonymous subscribers has changed in the Web Push notifications results .
Test as a known visitor
Perform this test only if you added a visitor identification method (see section 4.3).
- Create a test contact in your project.
- Identify yourself using one of the methods presented in the article Identify Anonymous Subscribers for Web Push.
- Go to your website and accept the web push notifications.
- Verify that the number of known visitors has changed in the Web Push notifications results.