

You can manage RCS consents in different ways depending on your communication objectives and how you want to structure the experience for your contacts. Two approaches are possible: use a communication type shared between SMS and RCS channels, or create separate communication types for RCS.
The choice depends primarily on the level of granularity you wish to offer. Separating communication types allows for more precise unsubscribe options. For example, contacts can choose to unsubscribe from RCS communications while continuing to receive your emails or SMS messages. By using a dedicated RCS communication type, contacts can unsubscribe from your RCS messages without unsubscribing from other communications you send them through other channels, including SMS.
Fallback with SMS When sending an RCS campaign, the message may be delivered via SMS if the RCS channel is not available on the contact's device (unsupported device or network). In this case, RCS consent remains the method used to determine the contact's admissibility to receive the communication. If a contact is eligible for RCS, that contact will receive the message, even if it is delivered via SMS using the fallback mechanism. |
Requirements
- The RCS channel must be activated.
- The consent management must have been set up.
Step 1: Create an Opt-In Field
Start by creating an opt-in field that is clearly named as an opt-in for RCS (it can include SMS depending on your communication strategy):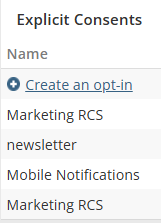
Resources |
Step 2: Create a Communication Type
Before creating your communication type, it's important to determine how you want to manage consent between SMS and RCS channels. The choice depends primarily on the objective of your communications and how you want to structure the experience for your contacts.
2.1 Add a new communication and assign it to the related opt-in(s):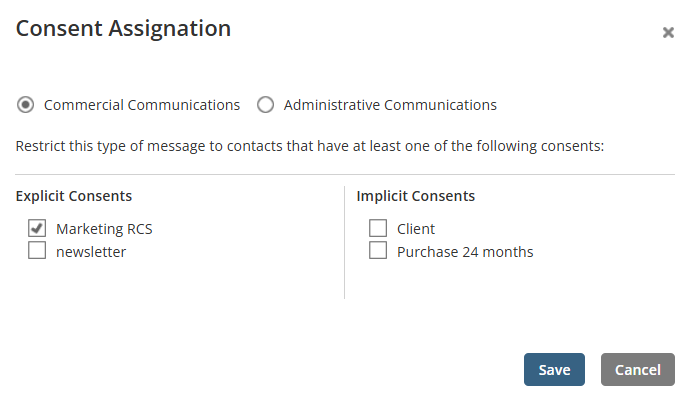
Note: You can assign several optins to the same communication type.
For more details, read the article Creating and Configuring a Communication Type.
2.2 Indicate the authized channels for the communication type.
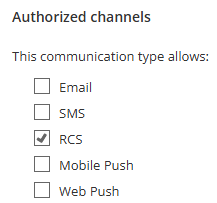
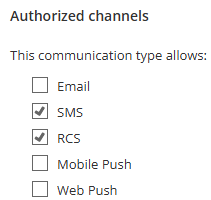
Step 3: Import Opt-In Statuses
When you import your contacts, include the opt-in status for each contact. If you make an import with a file (Excel/.CSV), the imported data could look like this example:
1 = subscribes the contact
2 = unsubscribes the contact
Resources |
Step 4: Create a Group
To target your contacts in your RCS, you must segment them into a group by including a condition for an RCS opt-in.
Start by adding an Opt-in condition: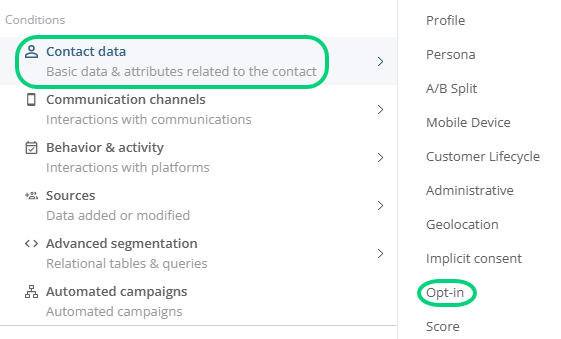
Then, select the RCS opt-in you want to use: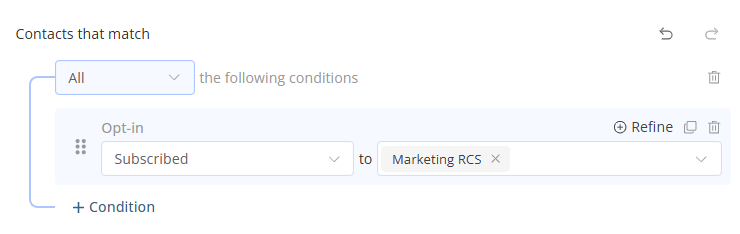
Step 5: Select the Group for the Targeting
When you program an RCS campaign, select the group to target in the Recipients section. For a contact to be targeted, that contact must:
- Be active
- Be admissible to the RCS channel
- Have an RCS consent
- Meet all the criteria included in the group created
→ Learn more about the status and admissibility of a contact