

Exporting contact data manually can be done with an external file downloaded on your computer (Excel or CSV). This file can then be used to archive or update content and reimport it into the platform. An export file can also be useful to transfer data to another integration or an ecommerce platform.
To export data for one contact at a time, you can do it in the contact's profile.
Step 1: Choose the Contacts to Export
Option 1: List
1.1 Go to the contact list (in the left menu: Audience → Contacts).
1.2 You can use filters to limit the contacts to export (in the example below, we filter the contacts with Paris as their city).
1.3 Click the Export button: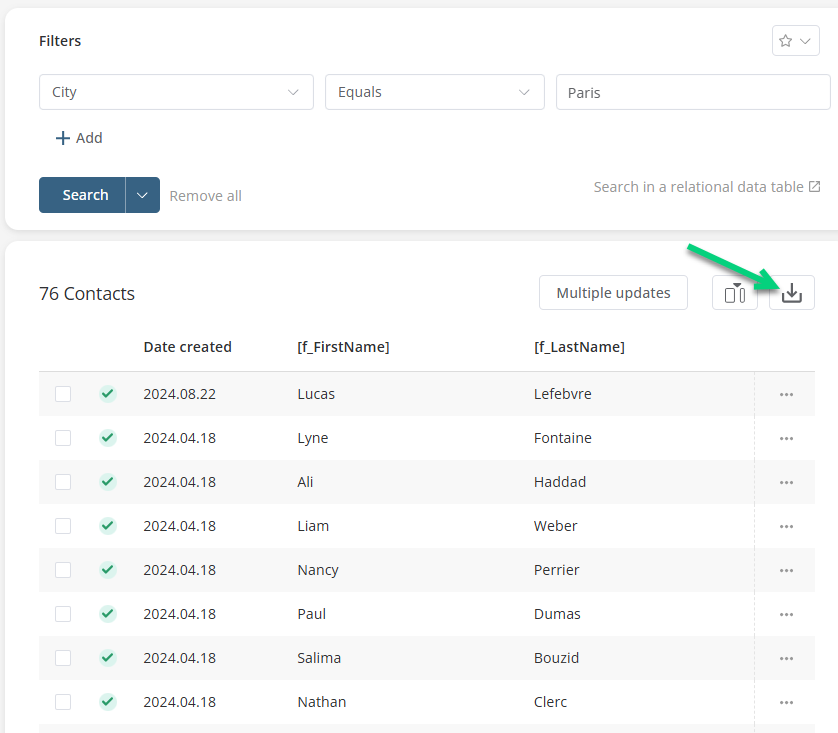
Option 2: Groups
In a group, go to Targeting:
You will see the list of contacts included in the group Click the Export button in the upper right:
To learn more on groups, se the article on how to create groups.
Step 2: Choose the Export Options
After clicking on Export, select among options for the content and the format: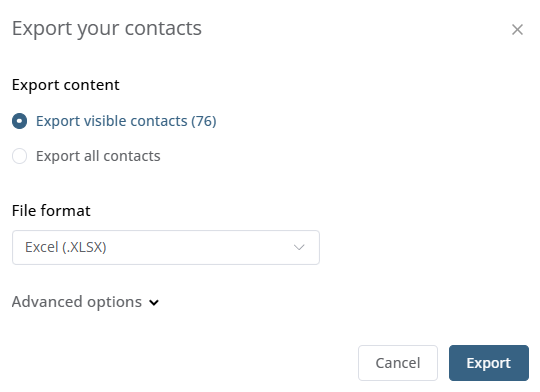
Content: You can either export all the projet's contacts or, if you added filter(s) or used a group, you can export only the contacts included by these filters.
File format: Then, choose Excel or CSV format. For CSV, there are 2 options. It is recommended to choose the UTF-8 universal standard, which covers all special characters unless your data have ISO-8859-1 format.
Finally, click Export to download your file!
Administrative fields: This option (in the advanced options) allows you to include administrative fields, such as the contact creation, modification or activation date.